PayPal Payout is a service that conveniently allows you to send money instantly to hundreds of recipients at one time. We painlessly integrated it into one of our clients apps. Before we implement an example in Rails using the Ruby PayPal SDK, let’s compare it to its counterpart also from PayPal – Mass Pay.
Mass Pay vs Payouts
There are two PayPal services available when it comes to paying a large number of recipients. Payouts is the new and shinier service that uses a RESTful API instead of NVP/SOAP API, that Mass Pay uses. Although Mass Pay is still around (for legacy) it’s soon to be deprecated, Paypal recommends we use payouts. Here’s why:
- You can send payment to up to 500 recipients in one API call, while Mass Pay only allows 250
- You can generate reports at any time by querying the payouts by status, recipient or time.
- Duplicated batches are prevented from being processed.
Let’s get started!
PayPal Payouts
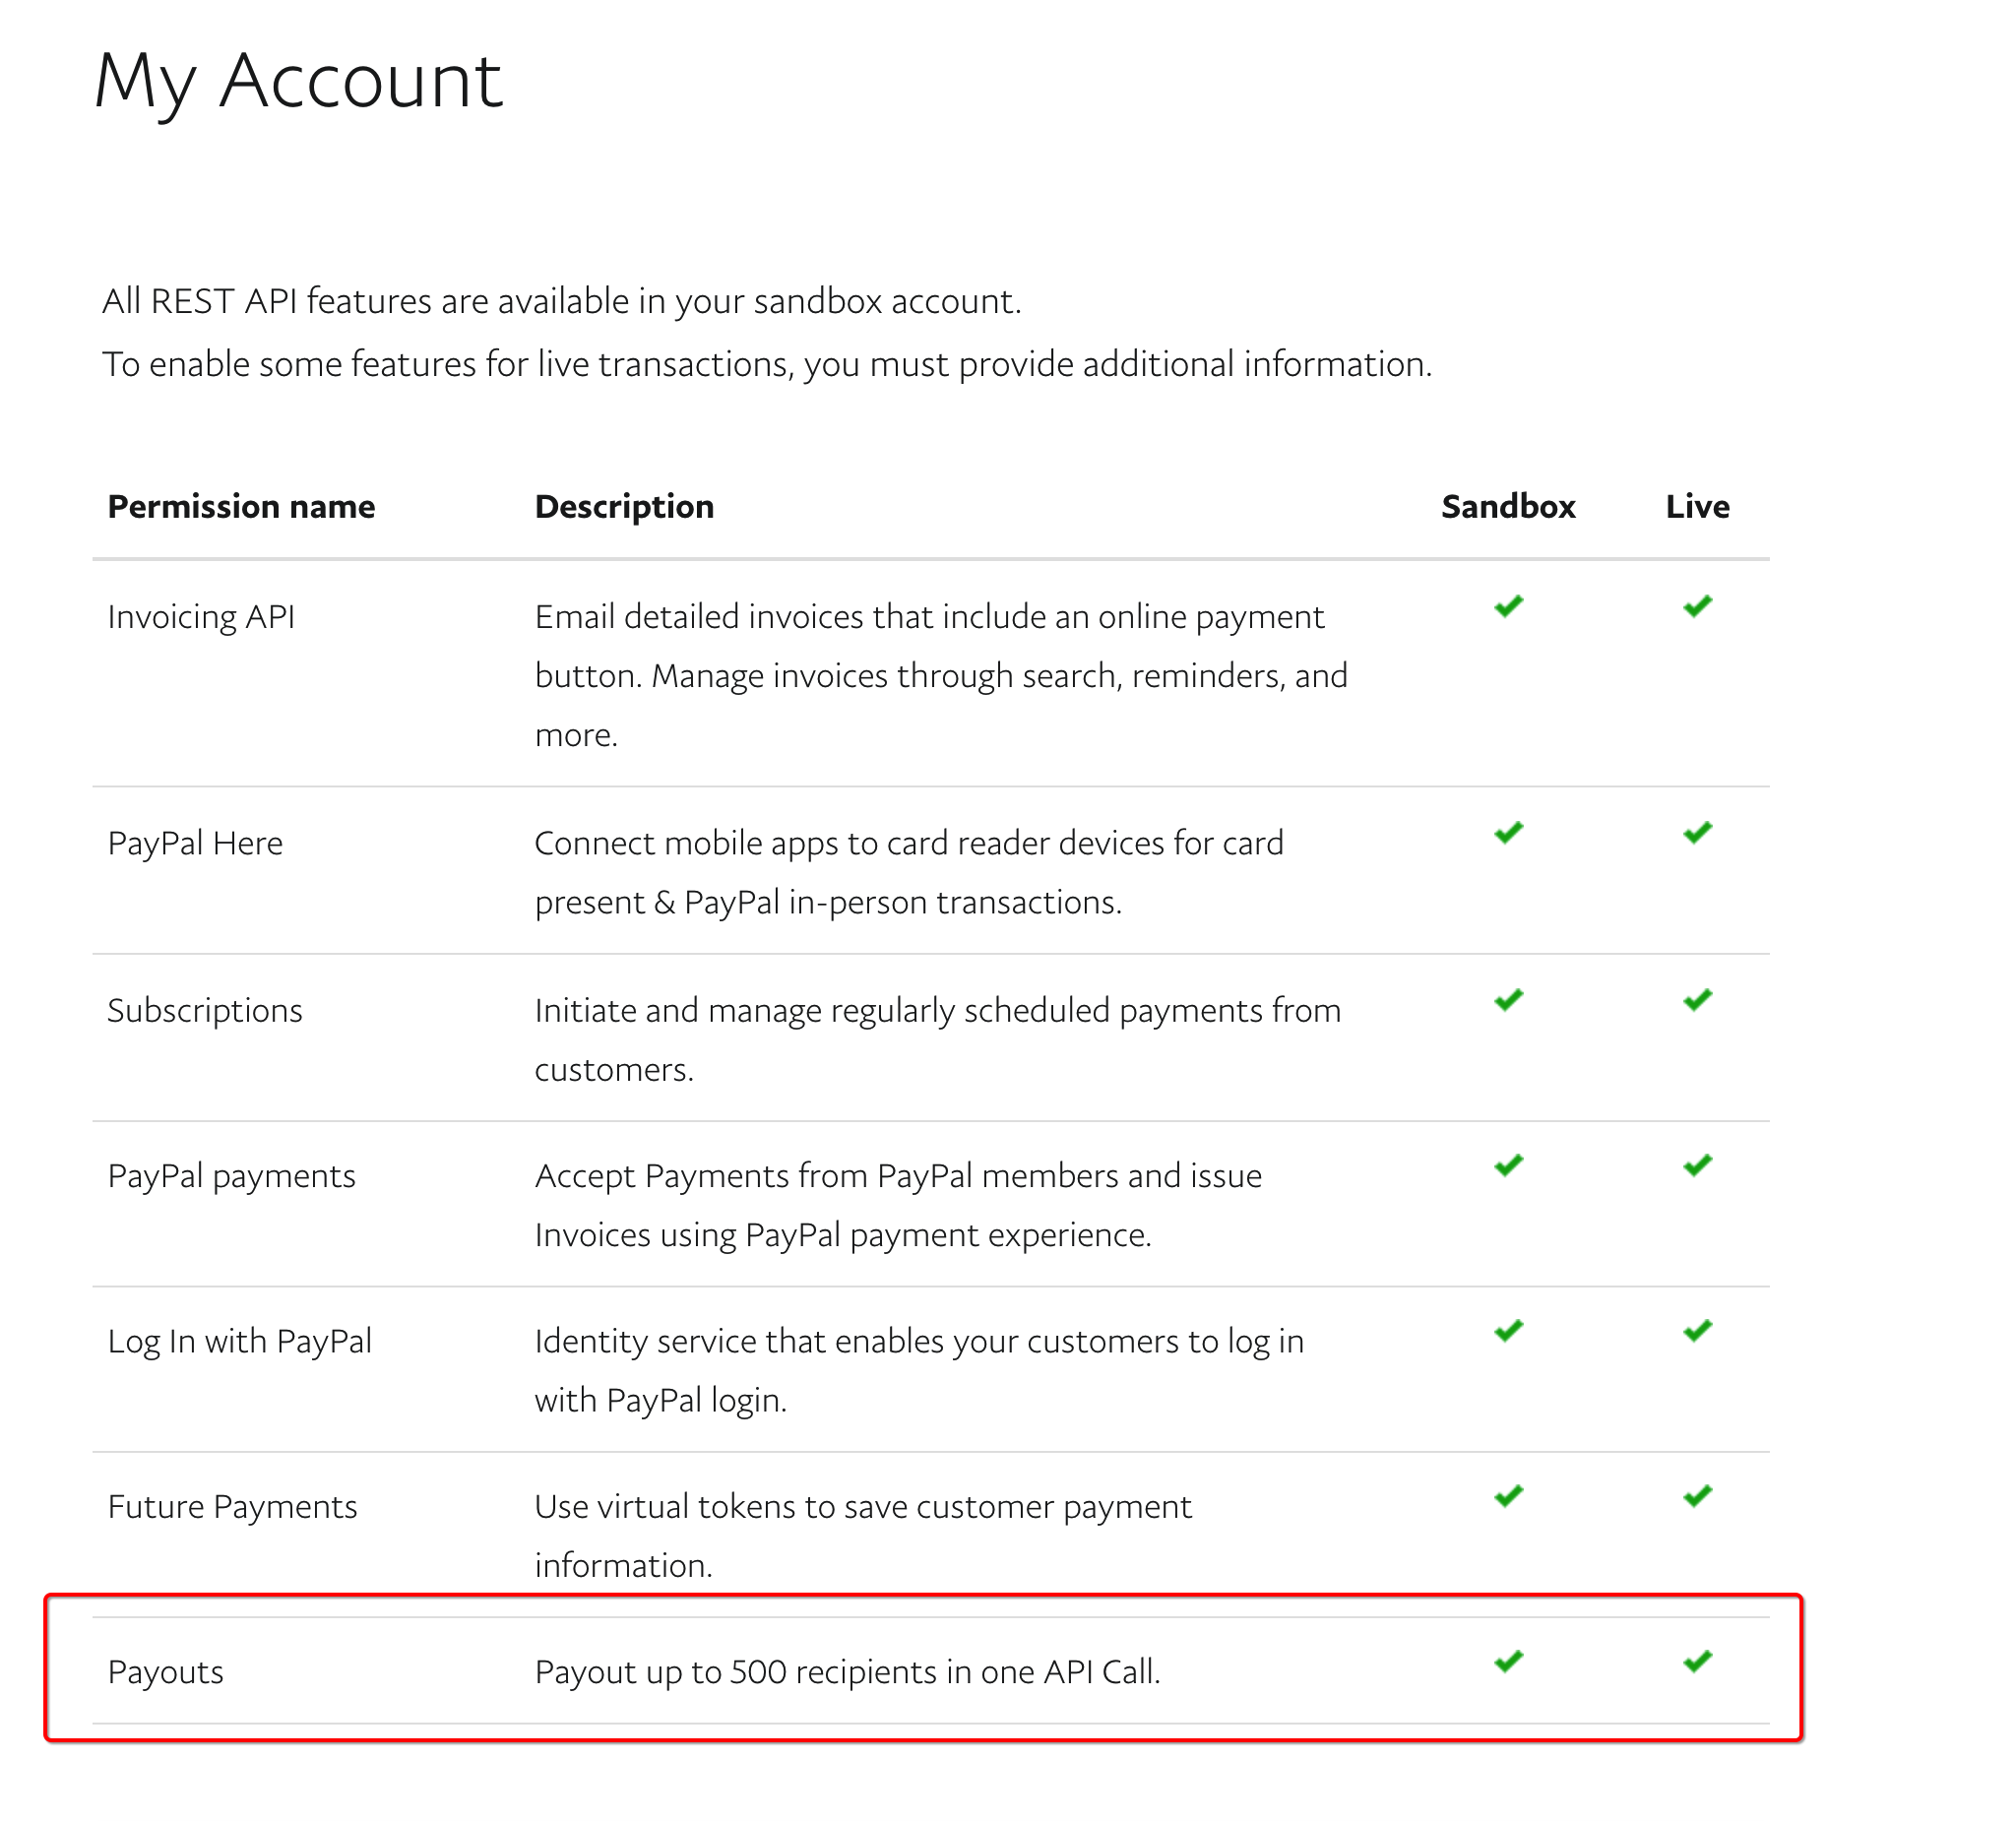
I am going to assume that you have an existing project with a list of recipients that need paying. Before you can use payouts, you need to make sure that it is enabled on your account. It should be automatically enabled in sandbox mode.
After that, you can create a REST API app from the applications section in the developer console. A Client ID and Secret Key will be generated after you have created the app, this is all we will need for now.
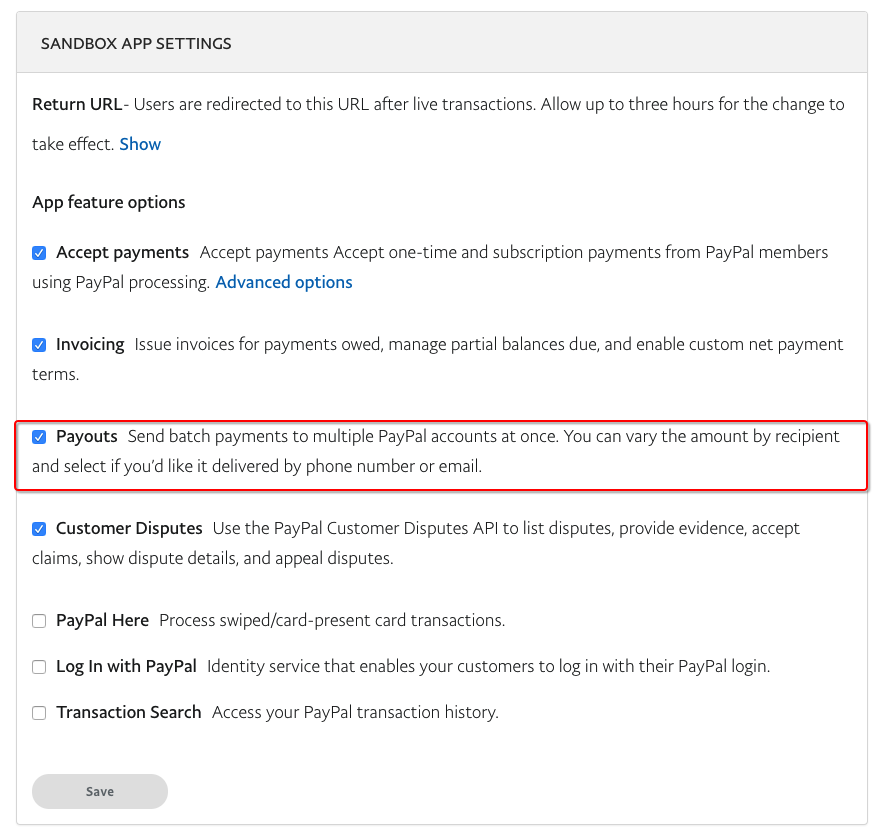
Lastly, in the app setting further down the page, make sure that payouts is ticked.
Creating Batch
Once all that is done, make sure you follow the PayPal installation guide from the readme. It’s a simple installation process, add it to your gem file, then run bundle. This generator command (rails g paypal:sdk:install) will create two config files like below:
# config/initializers/paypal.rb
PayPal::SDK::Core::Config.load('config/paypal.yml',  Rails.env || 'development')
PayPal::SDK.logger = Rails.logger
# config/paypal.yml
development: &default
  # Mode can be 'live' or 'sandbox'
  mode: sandbox

  # Credentials for REST APIs
  client_id: CLIENT_ID
  client_secret: CLIENT_SECRET

test:
  <<: *default

production:
  <<: *default
  mode: live
The payouts example code from the repo may not explain much, but it is a good overview of what is involved when sending a payout. I have a Statement table that contains a list of recipients that need paying. It also includes how much we should pay them, along with their PayPal email. Pending is the default status of statements before payments are processed and after the payment is made, each statement is updated with the status of the payout from the webhook (we see this below).
Let’s take a look at the code snippet. First, we get statements in batches of 500 (the limit of a payout). We instantiate a new payout and pass through a randomly generated sender_batch_id. Keep in mind that the sender_batch_id must be unique. If you specify a sender_batch_idthat was used in the last 30 days, the API rejects the request and returns an error message that indicates the duplicate sender_batch_id. items is an array that contains payouts to recipients.
Statement.pendings.find_in_batches(batch_size: 500) do |payout_batch|
  @payout = Payout.new({
    :sender_batch_header => {
      :sender_batch_id => SecureRandom.hex(10),
      :email_subject => 'You have received a payment from CookiesHQ'
    },
    :items => payout_items(payout_batch)
  });
end

begin
 @payout_batch = @payout.create
 # Logic to update any statements
rescue ResourceNotFound => err
 logger.error @payout.error.inspect
end
payout_items method returns an array where each item in the array, has data for a payout to a recipient.
def payout_items(payout_batch)
  items = []

  payout_batch.each do |payout|
    items << {
      recipient_type: 'EMAIL',
      amount: {
        value: "#{payout.total.round(2)}",
        currency: 'GBP'
      },
      note: 'Thanks for your business',
      sender_item_id: "#{payout.id}",
      receiver: "#{payout.paypal_email}"
    }
  end

  items
end
That’s pretty much all you’ll need to be able to send payout! I wrapped all this in a service and invoking the service will process the pending batches.
Webhooks
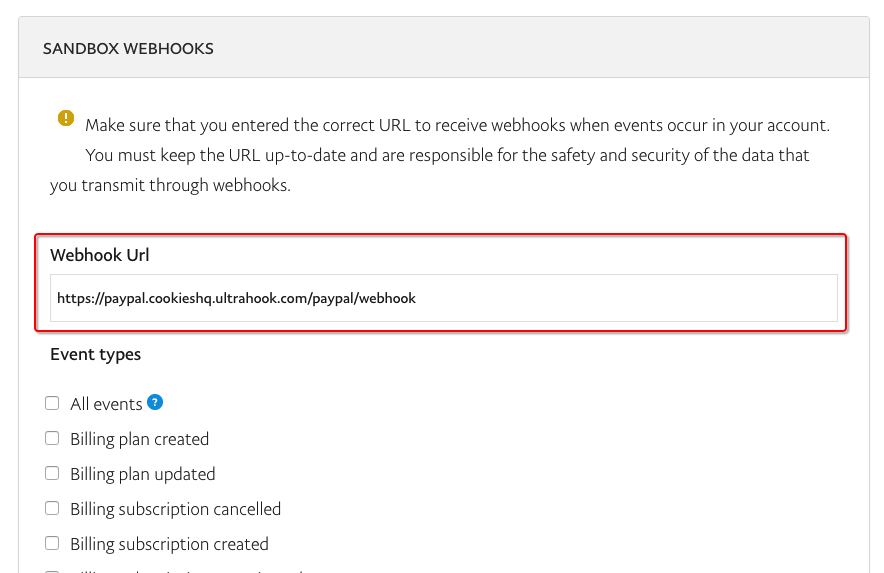
We can listen out for a callback from PayPal to update us on the progress of our payouts. From app settings, you can enter the endpoint URL you would like PayPal to send events to. When testing locally, I use Ultrahook to open a tunnel to my localhost server.
You can tick the events you would like to subscribe to:
You can configure multiple endpoints with different events going to each. For example, you can set up a separate endpoint to listen only to payment sale webhooks, along with another endpoint listening for subscriptions.
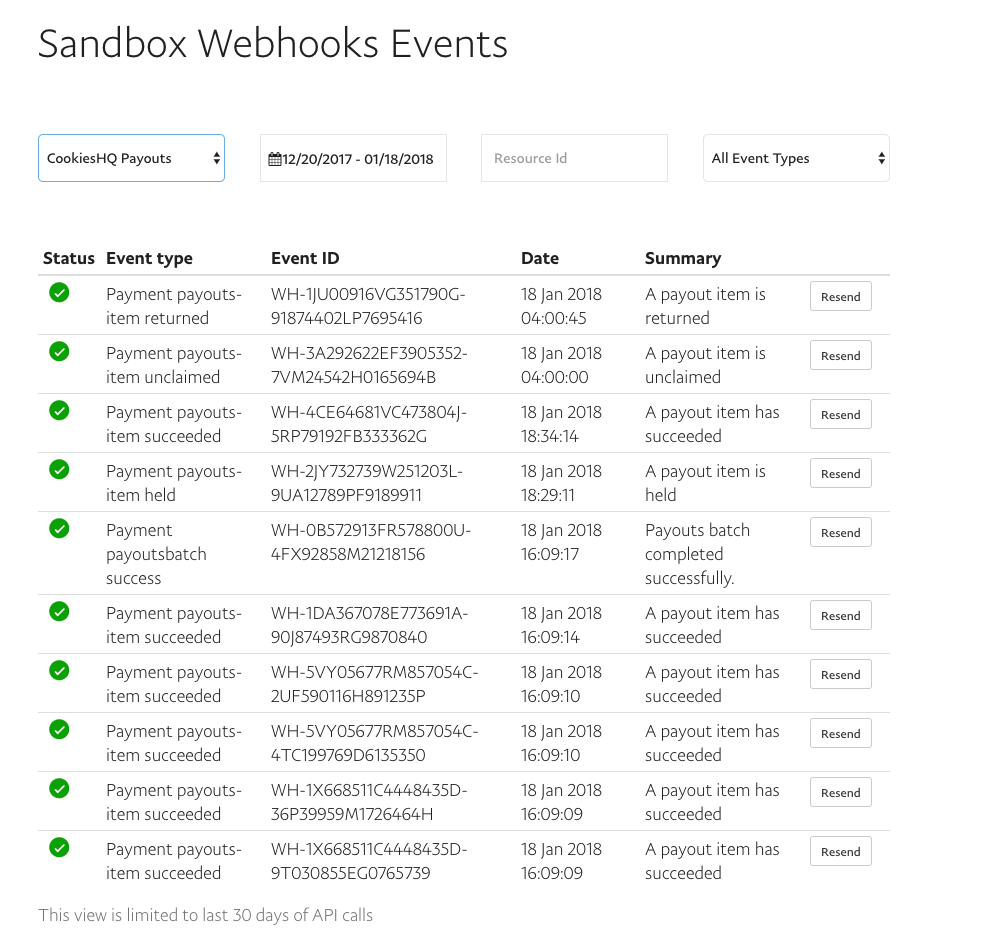
After a successful payout, this is what the webhook events may look like:
def webhook
  if params["resource_type"] == "payouts_item"
    payout_batch_id = params["resource"]["payout_batch_id"]
    payout_id = params["resource"]["payout_item"]["sender_item_id"]
    status = params["event_type"].split(".").last.downcase.to_sym

    @statement = Statement.find_by(id: payout_id, payout_batch_id: payout_batch_id)

    if @statement
      @statement.update status: status, processed_on: DateTime.now

      UserMailer.new_statement(@statement).deliver
    end
  end
end
You can take it further by verifying webhooks that are sent your way. You can see the example code here and the docs here.
Hopefully, you should have everything you need to make a kick-ass integration!
We’ve also written an extensive blog post on how to receive web hooks in your Ruby on rails application, take a look!
Happy Coding!


