One of the reasons we create bots is to help us automate tasks, either for scale or repetition. Here’s our simple guide to creating a Python Twitter bot that can pull information from a source and post it for you automatically.
A common function of Twitter bots is scheduling. There are plenty of bots that can automatically post a tweet at your chosen time and date, like the Buffer app.
You can extend the functionality of one of these bots so that it monitors a source (Basecamp, Trello, Asana, Reddit, another Twitter or social media account, or pretty much any service that offers an API) for information. When it detects a piece of information – within the constraints you have given it – it can parse it and make a post on Twitter.
Here’s how to create your own Python Twitter bot that can retrieve info from a source and post it to Twitter every day. We’re using Python because, as of July 2018, Google Cloud Functions supports a Python runtime, which makes creating these kind of bots possible.
UPDATE: As of 29th Nov 2019, Amazon now also supports Ruby with AWS Lambda – you can now build a bot using these technologies.
Looking for expert guidance or developers to work on your project? We love working on existing codebases – let’s chat.
Why serverless?
1. Become a Twitter developer
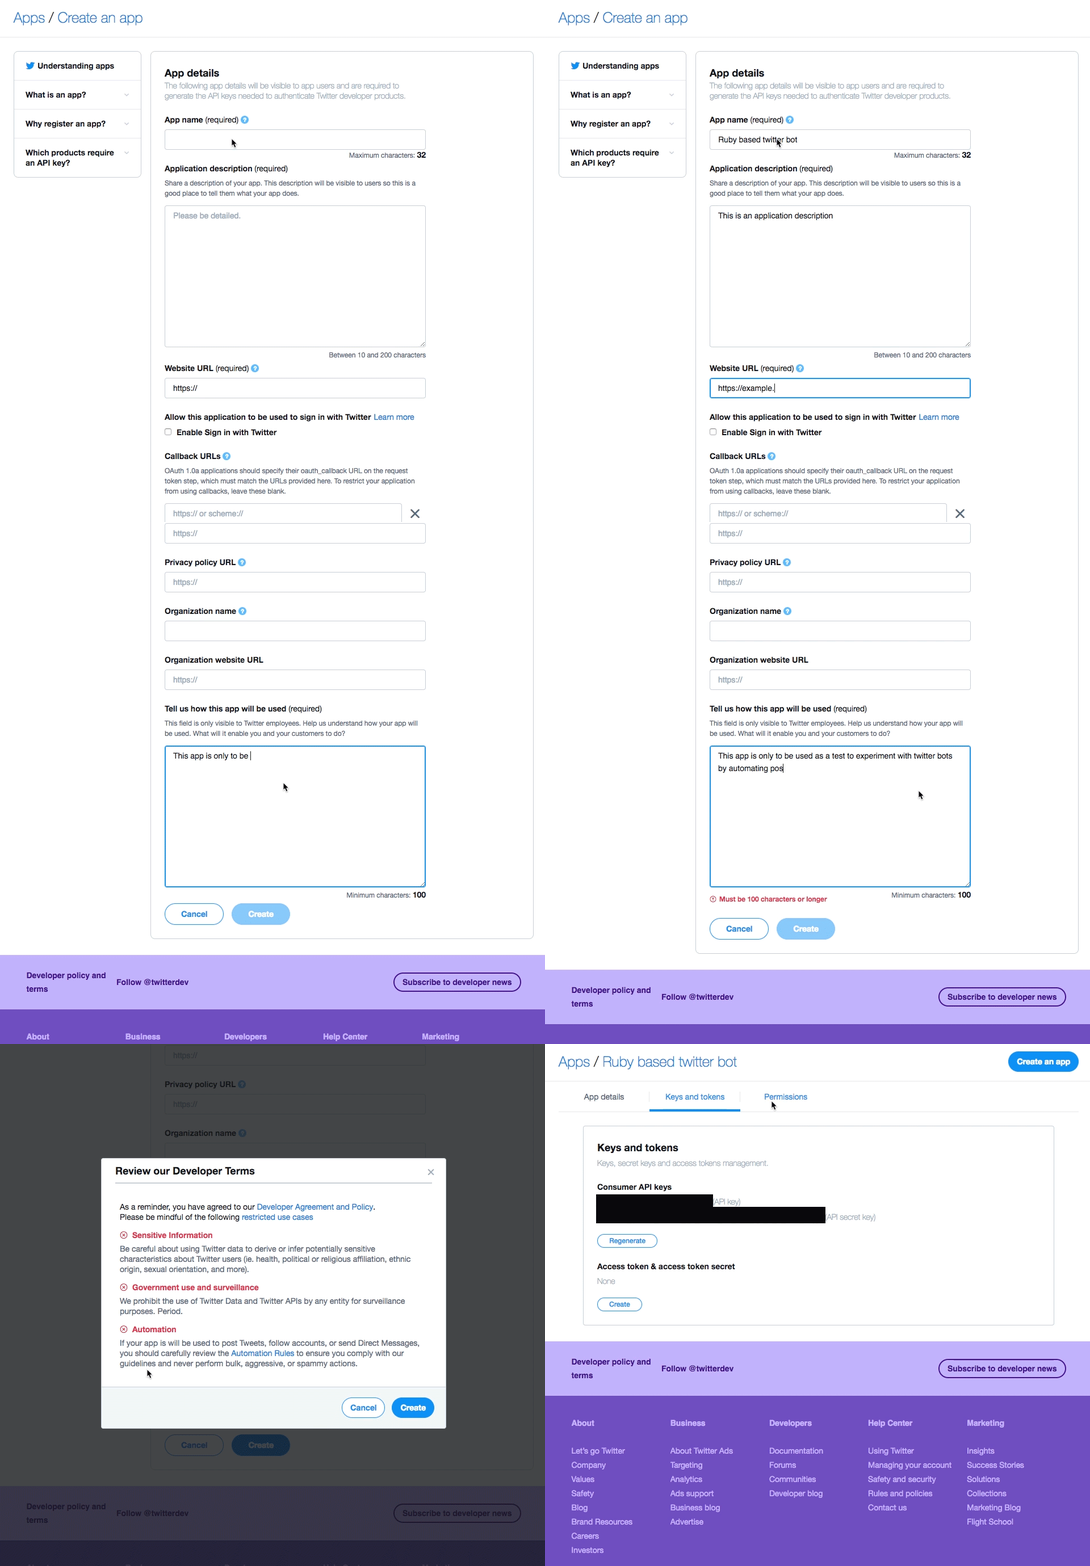
First-time Twitter developers must apply for a Twitter developer account to access their APIs. Once you’re approved, you’ll be able to create an app that uses their API.

Your application name must be unique. Be ready to try another if your application name is already taken.
Once you’ve signed up, you’ll be given access tokens and secret keys. Be careful – if someone gets hold of them, they can make requests on your behalf or even take control of your Twitter account. So keep yours safe.
Be aware that Twitter has rules around what can and can’t be automated on their platform – make sure you familiarise yourself with their rules around automation.
2. Set up Google Cloud and enable Functions

Before you can use the Google Cloud platform, you need to have an account. First, head over to Google Cloud and log in to your existing Google account, or create a new one.
Next, you’ll need to create a new project or use an existing one. Think of projects like workspaces within Google Cloud. Each app you build can be set up as its own project. If this is your first time using Google Cloud, you’ll see a button to create a new project. If not, select on the drop-down next to your current project’s name, then select ‘New Project’.
Lastly, go to the Cloud Functions dashboard and make sure functions are enabled. You’ll also need to provide billing details before you can use some features of Google Cloud. To do that, go to the main menu at the top left, and go to the billing section. There you can enter your details, set up alerts and keep an eye on your spending.
3. Code your Python Twitter bot
Now that we have all the setup out of the way, it is time to write the logic for the Python Twitter bot. I’ll be using Asana, a team organisation app, as my tweet source.
Within Asana we can create projects, and within each project we can add a list of tasks (which will contain the content of the tweets). We can assign due dates to these tasks and set things up so that – when the due date for a task comes up – the task is posted to Twitter.
These are the actions that our simple bot will perform every day:
- Connect to Asana and pull the list of tasks within a specific project.
- Loop through and check if each has a due date.
- Post the contents of each task due for that day to Twitter.
Start by creating a working project directory. When we come to deploy our functions, the script will zip up everything within the directory and deploy it to Cloud Function, so make sure that any files that you don’t need are either listed in the .gcloudignore file or not within the directory. Next, create a main.py file – this is where we will write the bot logic, create a requirements.txt and add Tweepy and Python-dotenv.
Tweepy is an easy-to-use Python library that we will be using accessing the Twitter API. Python-dotenv is a great library that reads the key-value pair from the .env file and adds them to an environment variable. We will use this to manage the API keys. For more options when it comes to managing secret keys, check out the Google Cloud resource on the subject.
python-dotenv
tweepy
CONSUMER_KEY='key'
CONSUMER_SECRET='key'
ACCESS_TOKEN='key'
ACCESS_TOKEN_SECRET='key'
Install the libraries using pip install -r requirements.txt. If it all runs successfully, you’re all set and ready for a basic ‘hello world’.
import os
import sys
import tweepy

from dotenv import load_dotenv
load_dotenv()

def setup_api():
    auth = tweepy.OAuthHandler(os.getenv('CONSUMER_KEY'), os.getenv('CONSUMER_SECRET'))
    auth.set_access_token(os.getenv('ACCESS_TOKEN'), os.getenv('ACCESS_TOKEN_SECRET'))
    return tweepy.API(auth)

def post_tweet():
    api = setup_api()

    tweet = 'Hello, world!'

    status = api.update_status(status=tweet)

    return 'Tweet Posted'
4. Deploy to Cloud Functions
If you’re happy with everything, it’s time to deploy. Run this script:
gcloud functions deploy post_tweet --region europe-west1 --memory=128MB --env-vars-file .env --runtime python37 --trigger-http
… and go make yourself a nice cuppa – it takes a few minutes.

Here is our example, using Asana as the source for the tweets.
import os
import sys
import tweepy
import asana
from datetime import datetime

from dotenv import load_dotenv
load_dotenv()

def setup_api():
    auth = tweepy.OAuthHandler(os.getenv('CONSUMER_KEY'), os.getenv('CONSUMER_SECRET'))
    auth.set_access_token(os.getenv('ACCESS_TOKEN'), os.getenv('ACCESS_TOKEN_SECRET'))
    return tweepy.API(auth)

def post_tweet():
    twitter_api = setup_api() # Setup Twitter
    client = asana.Client.access_token(os.getenv('ASANA_TOKEN')) # Setup Asana

    for task in client.projects.tasks(os.getenv('ASANA_PROJECT_ID'), fields='id'):
        full_task = (client.tasks.find_by_id(task['id']))

        if full_task['due_on'] is None: continue

        asana_date = full_task['due_on']
        task_date = datetime.strptime(asana_date, '%Y-%m-%d').date()
        today = datetime.now().date()

        if today == task_date:
            twitter_api.update_status(status=full_task['name'])

    return 'Tweet Posted'
5. Schedule daily automation

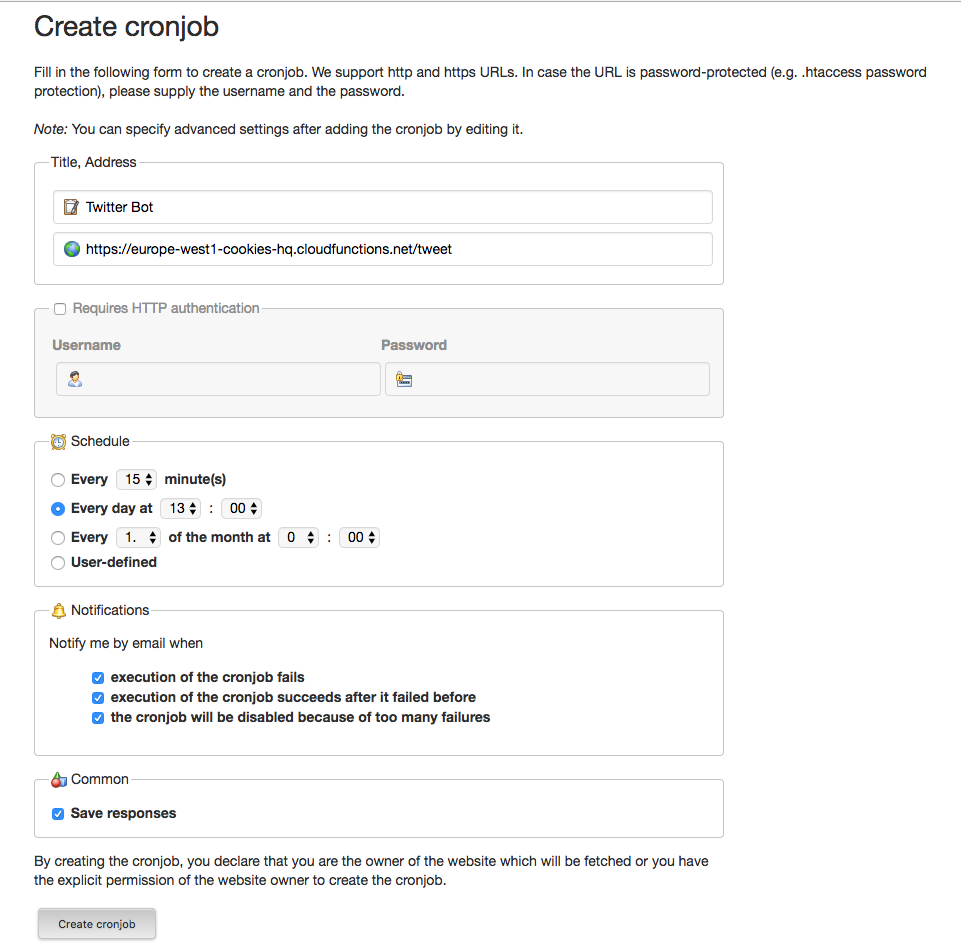
To make your Python Twitter bot tweet every N minutes, we need to make a cron job. A cron job is a task executed every X amount of time and is usually configured directly in the operative system running the server. But, as I promised at the beginning of the post, let’s keep the servers out of sight and use a great free service called cronjob that will do the requests for us.
Once you’ve registered an account on cron-job.org, you’ll be directed to create a cronjob as shown:

… and that’s it! Enjoy your new Python Twitter bot.
Think of this as laying the foundations of your bot – now it’s up to you to determine how complex you want to make it. A benefit of being serverless is that you only have to worry about solving your problem and not about scaling.
Why not Ruby?
Need a bot built?
Let’s find out what we can build together. Drop us an email or use the contact form below to get the ball rolling.