So you’ve built and tuned your machine learning model using Keras with TensorFlow backend. Now you want to deploy it to production so it’s available for use within Ruby on Rails.
Here’s our guide to getting your model online, making predictions at scale and serving lots of users.
When I first came across this problem there wasn’t a lot of help available online. Since then, I’ve discovered a few solutions that I will explore in future blog posts, including using Amazon web services, Microsoft Azure or a custom solution.
In this post however, we’ll be looking at how to use Google’s Cloud ML service to get your model online.
First things first
If you’re using Keras with TensorFlow backend, you can export your Keras model as a TensorFlow model. If not, you can directly export your TensorFlow model for serving.
With a TensorFlow model, we can upload it to Google’s Cloud ML (machine learning) service. From there, we can support as many users as we need through a straightforward API.
Set up Google Cloud
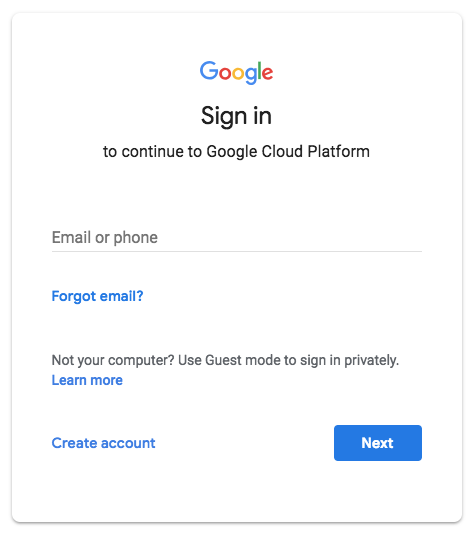
Before you can host your machine learning models on Google Cloud, you need to have an account.
First, head over to Google Cloud and log in to your existing Google account or create a new one.
Next, you will need to create a new project. Think of projects like workspaces within Google Cloud. Each app you build can be set up as its own project. If this is your first time using Google Cloud, you’ll see a button to create a new project. If not, click on the drop-down next to your current project’s name, then click on the ‘New Project’ button.

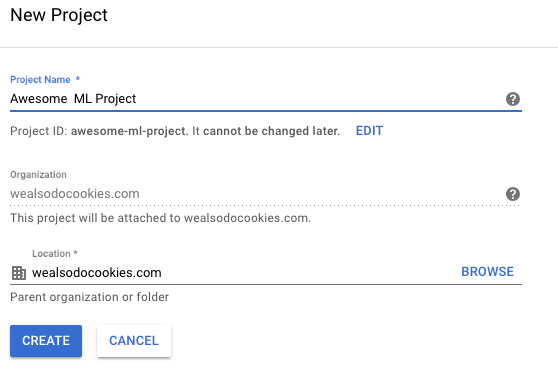
Give your project a name. You’ll notice that your project will also be assigned a unique project ID, as shown above. That’s the ID you’ll use to access this project from your apps. It may take a minute to create your project, but you can monitor its progress in the notifications bar at the top of the screen.
Enable Cloud ML
Since the platform has a lot of features, not all of them are enabled by default. You need to enable the Google Cloud Machine Learning service before you can use it.
First click on the main menu at the top left of the screen, then select ‘APIs & Services’ followed by ‘Library’.
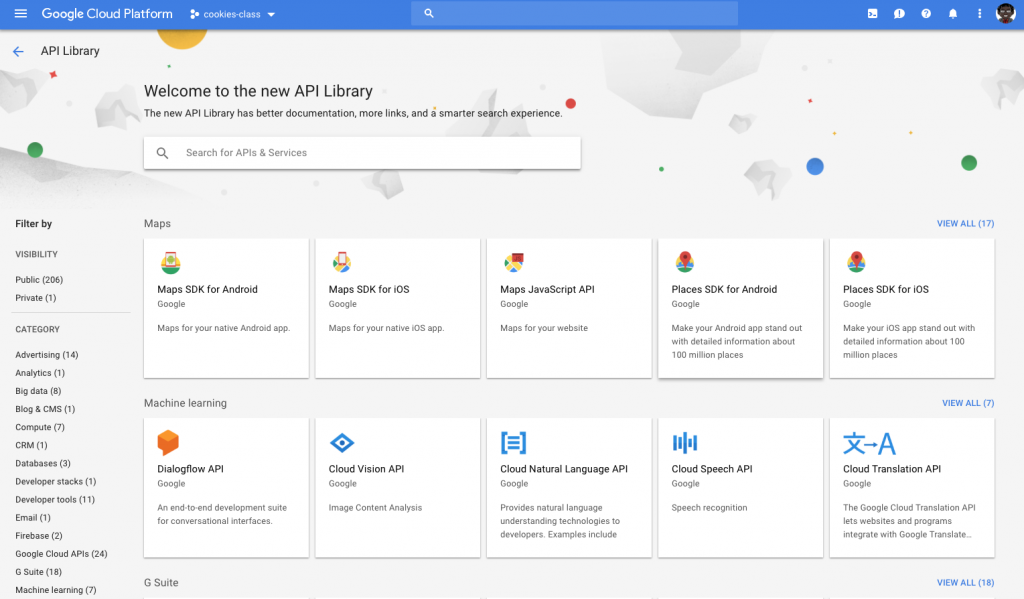
You’ll see a list of all the Google services you can enable. Search for ‘Cloud Machine Learning Engine’ and click on it when it appears.
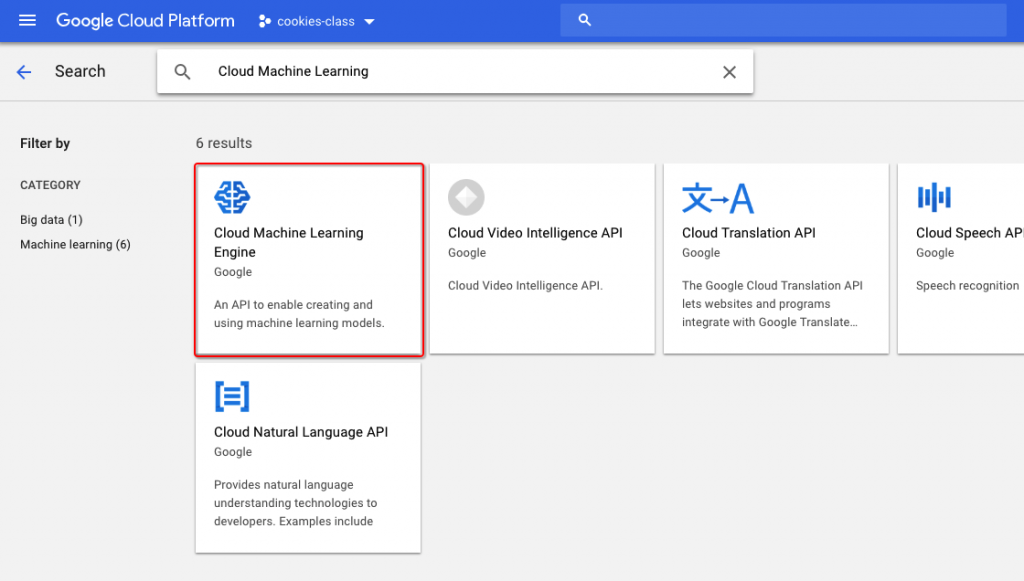
You’ll be taken to a homepage that explains the service. If Cloud ML isn’t already enabled, click to enable it.
Finally, you’ll need to provide billing details for your account before you can use some features of Google Cloud. To do that, go to the main menu at the top left, and go to the billing section. There you can enter your billing details, set up alerts and keep an eye on your spending.
Install SDK
Now you can move on and install the Google Cloud SDK. The SDK contains helpful utilities that you can use to interact with the Google Cloud services from your terminal. First, go to the SDK interactive download page.
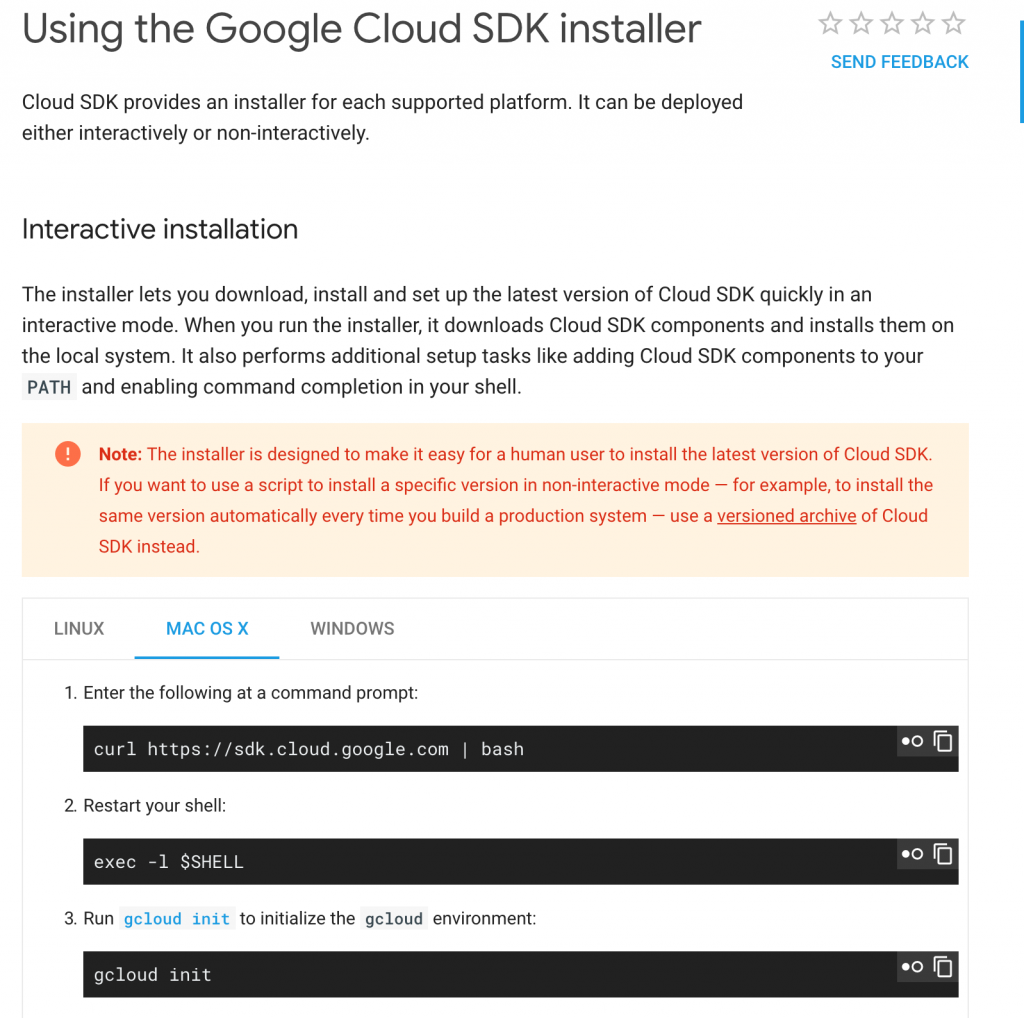
This will give you installation instructions for Linux, Mac and for Windows – the directions are different for each OS.
Follow the instructions for your OS to install the SDK. Once you have the Google Cloud SDK installed, you’ll need to activate it by logging in from the command line/terminal. To do that, open up a command line window on your computer, and then type gcloud init and hit enter. It will ask if you want to log in – press enter to continue and the Google Cloud SDK will try to open a browser window to the Google login page. Sign in to your Google account and confirm the permissions.
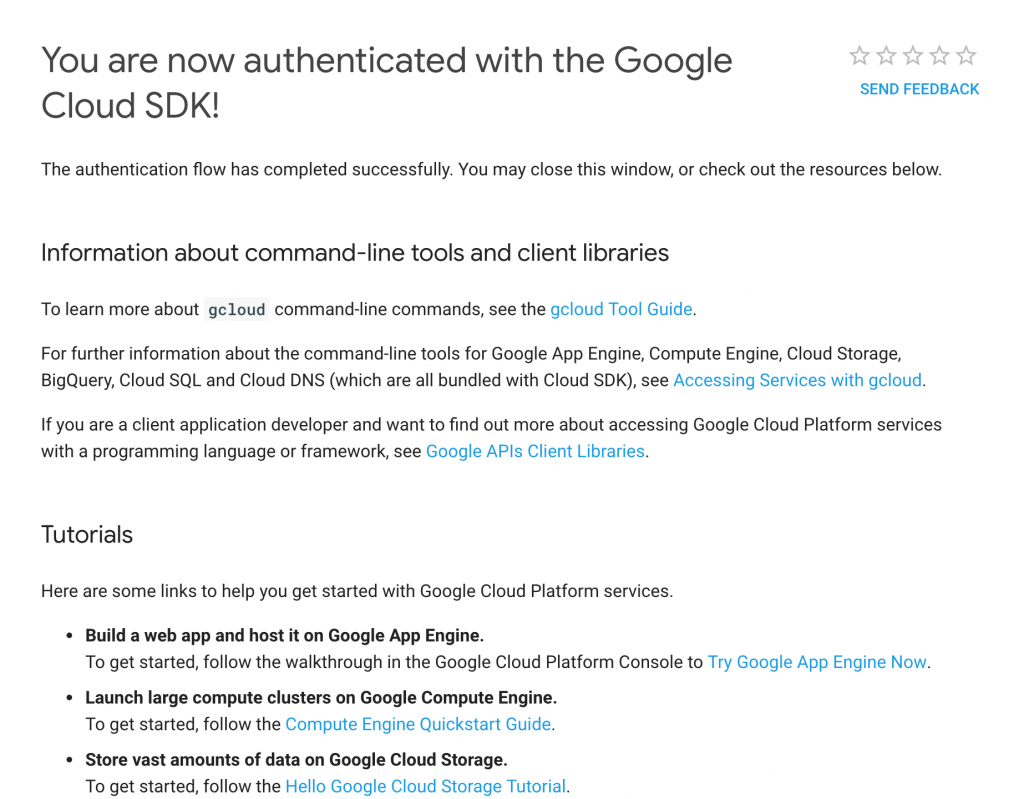
Once you see this message – well done! – everything is ready to go.
Exporting the model
When using Keras, you need to define the neural networks and run the training process by calling the fit function before you can export your model. To export your model as a TensorFlow model you will use TensorFlow directly, adding the following code to your script.
import tensorflow as tf
builder = tf.saved_model.builder.SavedModelBuilder('exported_model')
First, you import TensorFlow, then create a TensorFlow SavedModelBuilder class. This class lets us save a TensorFlow model with custom options. The only argument you need to pass to the class is the name of the directory you want to export the model in – the directory will be created for you.
inputs = {
    'input': tf.saved_model.utils.build_tensor_info(model.input)
}
outputs = {
    'earnings': tf.saved_model.utils.build_tensor_info(model.output)
}
Next, you need to declare what the inputs and outputs of your model will be. To do this you will use the utility function build_tensor_info. Because TensorFlow models can have many inputs and outputs, you need to tell TensorFlow which specific inputs and outputs you’ll use when making predictions from your models.
This is where using Keras comes in handing, Keras keeps track of the input and the output of your model very easily. You just need to pass model.inputin as the name of the input for TensorFlow to use and do the same thing for the output model.output.
signature_def = tf.saved_model.signature_def_utils.build_signature_def(
    inputs=inputs,
    outputs=outputs,
    method_name=tf.saved_model.signature_constants.PREDICT_METHOD_NAME
)
Next, you’ll create a TensorFlow signature def. Think of a signature def as a function declaration in TensorFlow. They are used in TensorFlow as a way to determine how to run the prediction function of your model. Generally speaking, this block of code will be the same for every model.
We then call TensorFlow’s add_meta_graph_and_variables function. This tells TensorFlow that we want to save both the structure of our model and the current weights of the model. K.get_session()refers to the current keras session, if it is not defined make sure you import just Keras. Then, we assign the model a special tag to make sure TensorFlow knows this model is meant for serving users and then, finally, we pass in the signature def we created above.
builder.add_meta_graph_and_variables(
    K.get_session(),
    tags=[tf.saved_model.tag_constants.SERVING],
    signature_def_map={
        tf.saved_model.signature_constants.DEFAULT_SERVING_SIGNATURE_DEF_KEY: signature_def
    }
)
You then call TensorFlow’s add_meta_graph_and_variables function. This tells TensorFlow that you want to save both the structure of our model and the current weights of the model. K.get_session()refers to the current Keras session – if it isn’t defined make sure you import just Keras.
Assign the model a special tag to make sure TensorFlow knows this model is meant for serving users and, finally, pass in the signature def you created above.
builder.save()
Lastly, call save on the builder then run your script. Once your script has finished running successfully, you should see a new folder with the same name as you passed to the save model builder.
And that’s it! Your model is now ready to be uploaded to Google Cloud.
Uploading the exported model to Google Cloud
Now that you’ve configured Google Cloud and SDK for the terminal and exported the model, it’s time to upload the export model to Google Cloud.
To use this model in the Cloud, it’s a two-step process. First, you’ll upload the model files to the Google Cloud storage bucket. Then you’ll create a new Google Cloud machine learning model using the files we’ve uploaded. Once the model is in the cloud, we can test it by sending it data.
To upload files to the Google Cloud service, you‘re going to use the command line. Open up a terminal and navigate to your project root directory (where your model is exported). To upload your model to the Google Cloud storage bucket, simply use the gsutil command:
$ gsutil mb -l europe-west2 gs://cookies-class-1000
Gsutil is a utility that handles basic Google service operations like creating new service buckets, moving files around, changing permissions and so on. The ‘mb‘ from the command stands for ‘make bucket’.
Google has data centres all over the world. You have to tell them which one you want to use. I’ve used europe-west2 as it’s located in London, UK.
Enter a unique name for the storage bucket – but remember what you chose! Press enter and the bucket will be created.
Next, you need to upload our model files into the storage bucket. To do that, you’ll run this command:
$ gsutil cp -R exported_model/* gs://cookies-class-1000/class_predictions/
Once again, you’re using gsutil and cp, which means you want to copy files from our computer to the Cloud. Your model files should now be stored on Google servers.
Next, we have to tell the Google Cloud ML service that we want to create a new model. For that, we will use this command:
$ gcloud ml-engine models create class_predictions --regions europe-west2
Here we’re using the gcloud tool to call the ML Engine service and we’re asking it to create a new model. The name of my model here is ‘class_predictions’ and I’m creating it in the same location as the bucket ‘europe-west2’.
You have created a model on Google Cloud ML service, but think of this like creating a folder – it’s just an empty placeholder. To make use of your model you need to upload and publish your exported model files. Once again, use the glocud tool to call the ml-engine service with this command:
$ gcloud ml-engine versions create v1 --model=class_predictions --origin=gs://cookies-class-1000/class_predictions/
In this example, I created a new version and called it v1. You can use any name you want, but it’s good practice to use sequential numbers that are easy to track.
Next, you have to pass in the name of the model that you want to create the version for and then pass the location of the file to use. Make sure to use the same storage bucket name you created earlier.
Go grab yourself a hot beverage as this may take a while.
Using the model from Google Cloud
Now that you’ve created the cloud-based machine learning model, let’s put it to use.
Google provides implementations of its API client library for many languages, but Ruby is still in alpha so you’ll need to create a python script that will call your model.
To use a cloud-based machine learning model from another program, we need two things. First, we need permission to make calls to the cloud. For this, we need a credentials file. This file keeps our cloud-based service secure from unauthorized use. Second, we need to write the function to call our cloud-based model.
Credentials file
Let’s start by setting up the credentials file. Head back to your project console and make sure you have the right project selected. From the ‘APIs & Services’ menu, select ‘Credentials’.

Here, you’ll see the ‘Create credentials’ drop-down. Click that drop-down button and choose ‘Service account key’.
From the service account, choose ‘New service account’, and then give it a name. For the role, under ‘Project’, choose ‘Viewer’. This is the permission required to make predictions for your cloud-based machine learning model.
When you’re done, click ‘Create’. You should receive a file download to your computer. You may want to rename it to credentials.json, to make it easier to work with.
Making predictions from Rails
You’re now ready to put it all together within your Rails app. Move your credentials.json within the rails repo – as these are sensitive keys make sure that they aren’t committed to the repo for extra security or find a way to make them ENV variables.
Then, create a new python script within the repo, and the following:
import sys, os
from oauth2client.client import GoogleCredentials
import googleapiclient.discovery

class HiddenPrints:
    def __enter__(self):
        self._original_stdout = sys.stdout
        sys.stdout = open(os.devnull, 'w')

    def __exit__(self, exc_type, exc_val, exc_tb):
        sys.stdout.close()
        sys.stdout = self._original_stdout

with HiddenPrints():
    PROJECT_ID = "cookies-class"
    MODEL_NAME = "class_prediction"
    CREDENTIALS_FILE = "credentials.json"

    # Values to make predictions for
    inputs_for_prediction = [
        {"input": [1, 0, 0.0, 1.0, 0.0, 0.0, 0.0, 1]}
    ]

    # Connect to the Google
    credentials = GoogleCredentials.from_stream(CREDENTIALS_FILE)
    service = googleapiclient.discovery.build('ml', 'v1', credentials=credentials)

    # Connect to the Model
    name = 'projects/{}/models/{}'.format(PROJECT_ID, MODEL_NAME)
    response = service.projects().predict(
        name=name,
        body={'instances': inputs_for_prediction}
    ).execute()

    if 'error' in response:
        raise RuntimeError(response['error'])

    results = response['predictions']

# The results
print(results)
Start off by defining a class that will help us with suppressing output so that the output we get from the script is only our prediction.
Then, make sure you have installed the python library ‘oauth2client’ and ‘googleapiclient’. Ensure that you correctly replace the project info variables so they’re correct to your project. The input for the API is a hardcoded variable, but this input can come from anywhere. From the Rails you can pass an argument to the python script when you call it, then use sys.argv to access it and pass it to the API. Finally, you can print out the result from the API.
Call from rails
From your Ruby file, you can backticks to call the python script we made earlier:
@result = `python script.py`
Backticks return the standard output of running cmd in a subshell. They allow us to capture the output from the shell.
Keep in mind that sending unescaped user input to backticks is highly dangerous – make sure you’ve cleaned up all user inputs if you’re sending them to your script.
Finally…
This is a generic guide that makes few assumptions about your model, system, or setup. Please feel free to experiment with this process and see what works best for you.
Keep an eye out for future explainers and share your ideas with us on Twitter – we’d love to hear how you get on.